You are currently browsing the category archive for the ‘Uncategorized’ category.
When it came time to choose my selection for the Sweet Melissa Sundays Baking Group, the decision was easy – Sour Cherry and Almond Biscotti. Cherries and Almonds are such a great flavor combination, and a favorite of mine. Also, almonds are the only nuts I could sneak into baked goods and still get a positive response from my husband!
Biscotti can seem intimidating, but are really quite easy to make. It’s the whole “twice baked” nature of them that people shy away from, but what’s so hard about baking something twice?!? The oven does all the work, right? I somehow managed to have everything on hand to make these, so it didn’t even require a trip to the store for me! Even easier! I did have to do so some substituting, so my pantry isn’t as well stocked as it seems…The recipe calls for 1/4 cup of fresh orange juice to reconstitute the dried cherries, but I only had a lemon. Also, since it required the zest of one lemon as well, I saw no reason to juice one citrus fruit and zest the other. I imagine if the cherries were soaked in orange juice it would lead to a sweeter cherry flavor, but I liked them tart.
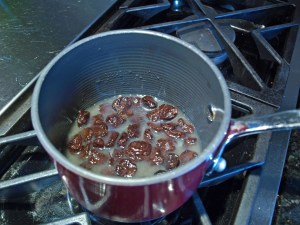 The dough comes together relatively quickly, but I don’t think there is enough flour in it. It was really sticky, and remained sticky after chilling for well over an hour, so I dumped another 1/4 cup on top and worked it in. It worked out perfectly.
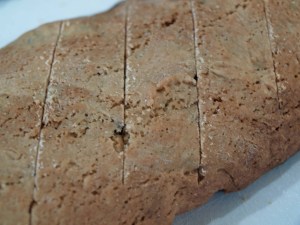
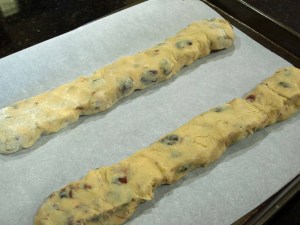 After baking the logs for 30 minutes you need to score the logs into 3/4-inch pieces at a 45 degree angle then cut straight through the score.
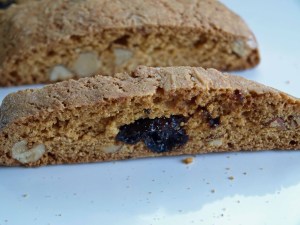
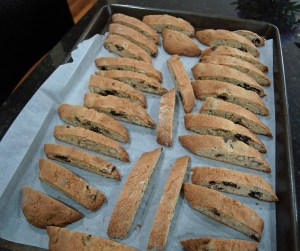 For the second baking you lower the oven to 275 degrees and bake the cut pieces for 60 minutes. This is what gives them that super crispy texture that even storing in an air tight container doesn’t make soggy. I brought the biscotti up to our cabin for the 4th of July and they were devoured by our friends over the weekend.
Melissa puts this recipe in her “After-School Snack” section but I think these are perfect with coffee. I’ll definitely be making these again, and perhaps will play around with different flavor combination like fig and walnut with orange zest, cherries and pistachios, or even get crazy and add chocolate chips! White chocolate chips and cranberries would be delicious, don’t you think?
Sour Cherry and Almond Biscotti
pages 72-73 of The Sweet Melissa Baking Book
- 1/2 cup dried sour cherries
- 1/2 cup fresh orange juice
- 4 Tablespoons (1/2 stick) unsalted butter, at room temperature
- 1 cup sugar
- Zest of 1 lemon
- 1/4 teaspoon salt
- 2 large eggs
- 1 1/2 teaspoons pure vanilla extract
- 1 1/2 tsp almond extract
- 1 3/4 cups all-purpose flour
- 1 teaspoon baking powder
- 1/2 cup whole blanched almonds, roughly chopped
BEFORE YOU START
Line a cookie sheet with parchment paper or aluaminum foil
- In a small saucepan over low heat, combine the cherries and orange juice and bring to a simmer. Remove from teh heat, cover, and let the cherries reconstitute.
- In the bowl of an electric mixer fitted with the paddle attachment, cream the butter, sugar, zest, and salt until light and fluffy, 3 to 4 minutes. Add the eggs, one at a time, mixing well after each addition. Scrape down the sides of the bowl. Add the vanilla and almond extract.
- In a separate bowl, whisk together the flour and baking powder.
- Add the flour mixture to the butter mixture in three batches, mixing well after each addition. Scrape down the sides of the bowl.
- Drain the cherries, discarding the juice. Stir the cherries and almonds into the dough.
- Turn the dough out onto the prepared cookie sheet, flatten, and refrigerate until firm, about 1 hour.
- On a lightly floured work surface, divide the dough in half. Using a little extra flour if the dough is sticky, roll each half into a log about 14 inches long.
- Position a rack in the center of your oven. Preheat the oven to 350 degrees. Line the cookie sheet with clean parchment paper.
- Place the logs about 4 inches apart on the prepared cookie sheet. Bake for 30 minutes, or until the logs are lightly golden and slightly firm. Remove to a wire rack to cool. Turn down the oven to 275 degrees.
- As soon as the logs are cool enough to handle but still warm, about 10 minutes, carefully peel them off the paper and transfer to a cutting board. Using a serrated bread knife, gently score the logs at 3/4-inch intervals on a 45-degree angle. After scoring, cut through each scored line in one motion with a sharp chef’s knife, slicing the logs into pieces.
- Carefully transfer the cookies to a freshly lined cookie sheet browned side down and not touching one another. Bake for an additional 60 minutes, rotating the cookie sheet after 30 minutes. Remove to a wire rack to cool on the pan to room temperature.
The biscotti will keep in an airtight container at room temperature for at least 1 week (assuming they last that long). For longer storage, tightly wrap in plastic wrap and then aluminum foil and freeze for up to 3 weeks. Do not unwrap before defrosting.
Submitting late this week since we spent the long weekend at our cabin in Wisconsin. Lots of boating, drinking, cooking and eating. It was a great weekend!
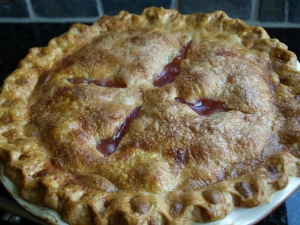
Rebecca of Beurrista chose this very summery pie this week – perfect for July 4th! This pie was delicious. In an effort to save time I need to admit that I used Pillsbury pie crust. Why mess with perfection? Their crust always works out. Plus, being a Minnesota girl I feel the need to support Betty Crocker…buy local! 😉 (I realize the pie crust is likely made in some plant in Louisville, KY or somewhere not at all close to Minnesota – let me make my own justifications)
The filling came together in a jiff, and called for a very unlikely ingredient, ground tapioca pearls. I substituted tapioca flour since I do not have a coffee grinder dedicated to just spices and really didn’t want coffee flavored fruit pie. I really thought this would be the secret ingredient to prevent a juicy fruit pie. Not totally, but it certainly wasn’t the same mess as my last attempt at fruit pies.
The pie bakes for a really long time, 1 hour and 45 minutes. I was nervous about it browning too quickly, so I checked mine after an hour. It was rather dark so I added foil to the crusts just to be safe. I also can’t leave well enough alone and took it out after 1 hour and 30 minutes. The juices were bubbling and it looked like it might set up. It was a bit messy when we cut into it, but not terrible. Next time I will leave it for the whole cooking time.
We cut into this pie well after dark, so I didn’t get any pictures of it sliced open. I can tell you that we thoroughly enjoyed this pie. My friend deemed it her favorite dessert ever and thought about the pie all weekend long. Surprisingly, there is one slice left…I think I might finish it off!
Thanks Rebecca for this amazing and well timed selection. Check out her blog for the recipe or buy the Sweet Melissa Baking Book. Also, check out the SMS bakers list to see other examples of this pie.
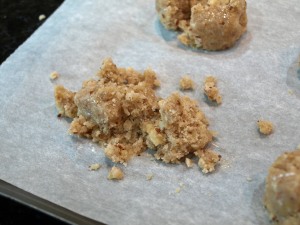
Wow. This week’s recipe was a disaster for me! First, I was unable to find unsalted pistachios. I was running out of time and couldn’t visit more grocery stores (or make it to Whole Foods where I suspect they had the unsalted nuts in bulk…) so I went with the variation on the recipe and purchased unsalted hazelnuts. Then the SEEDLESS raspberry jam became hard to find, but eventually I managed to find a jar. The seeds would have bugged me, so I was hell-bent on finding seedless. The dough came together quickly in the food processor, which I LOVE. I chilled it for the recommended hour while I made different cookie dough to bring to an after school event at my daughter’s school (more on this later). Since I’m not really a hazelnut fan, I decided not to crush more hazelnuts and roll the cookies in them, but I do like a meringue-y texture to cookies (reminiscent of these Swiss Meringue Horns I make my mom make for Christmas each year – delish) so I did roll the balls into egg whites. I’m not sure if this is where I went wrong or not….
This happened to EVERY cookie ball. I thought maybe I could salvage a few, but nope. I tried letting them warm up a bit and they were still a crumbling mess. I decided life is too short for frustrating cookies and dumped the whole thing in the trash. It was a very disappointing recipe, to say the least.
To see some successes – check out the other SMS bakers. And if, even after this rousing endorsement you feel compelled to make these cookies, visit Tracey’s blog (not me) for the recipe. Visit her blog anyway, she’s always up to some deliciousness.
Take a look at what my mom has been up to. She designed these blocks (the panda and the elephant) herself. Are you freaking kidding me?!? I wish I had half that talent. Well done Mom!
I’ve been thinking a lot lately about my food magazine “collection” (which I know is just another word for crazy) and what I can do with all of these magazines I subscribe to each month. It’s seriously out of control, and amazon.com is not helping by offering $5 subscriptions! I do enjoy reading all of the magazines I receive but only make a few new things each month, so I decided to make at least 2 recipes out of each magazine, each month. If several months go by and I’m not making anything then I’m not going to renew that magazine. I swear. This will help weed out some of the magazines I get and hopefully we will discover new recipes we enjoy making and eating.
I have been getting Everyday Food for years and love that magazine-lette (it’s wee…it’s not a full-blown magazine). I typically make several dishes from each issue and many of their recipes are my go-to recipes when I don’t know what to make. Their Lentil Soup from 2003 is one of those. It’s quick, delicious and often requested by friends and family. It’s the perfect winter soup recipe and is vegetarian to boot. Another favorite (and also vegetarian) is their Quick Chickpea Curry recipe from the Jan 2010 issue. This is not something we would normally eat. I love Indian food, but prefer an Indian buffet rather than just one dish for the variety. This curry was quick (as the name implies) and was a perfect lunch to whip up while we both were working from home.
You can find the recipe here or below:
Quick Chickpea Curry
- 1 tablespoon olive oil
- 1 large yellow onion, diced small
- 3 garlic cloves, minced
- 1 tablespoon curry powder
- 1 cinnamon stick (3 inches)
- Pinch of ground cloves
- 2 cans (15 ounces each) no-salt-added chickpeas, rinsed and drained
- 3 tablespoons ketchup
- Coarse salt and ground pepper
- Chopped cilantro and lemon wedges (optional), for serving
Directions
- In a large straight-sided skillet, heat oil over medium-high heat. Add onion and cook, stirring occasionally, until dark brown around edges, about 6 minutes. Add garlic, curry, cinnamon, and cloves and cook, stirring, until fragrant, 30 seconds. Add chickpeas, ketchup, 1 teaspoon salt, 1/4 teaspoon pepper, and 2 cups water. Bring to a boil; reduce to a simmer, cover, and cook 20 minutes. Uncover, and increase heat to medium-high; cook until sauce is slightly reduced, 5 minutes. Serve topped with cilantro, with lemon wedges alongside if desired.
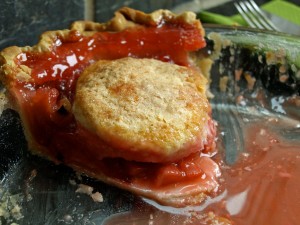
This week’s Sweet Melissa Sundays was hosted by Tracey of Tracey’s Culinary Adventures. I’ve always enjoyed reading her blog (and not just because she spells her name like me!). This week’s recipe was Strawberry Rhubarb Cobbler Pie. Rhubarb is big in Minnesota, and a spring/summer staple around our house. I first had it about 10 years ago at my friend’s parent’s house when they made a very quick, very delicious rhubarb crisp made from rhubarb plucked straight from their yard. I’d never had rhubarb before and loved the fact that you could make something so delicious from a weed growing out of your flower beds. I took some freshly cut stalks home with me that night and have held an appreciation for home grown food since then. My grandparents were gardeners, growing typical Italian produce. I was too young (and not yet a foodie) to fully appreciate the abundance of tomatoes and peppers that was available, but fondly remember getting together at their house to can the tomatoes and hot peppers. This is actually something that I’ve started to do (with the help of my mom), though it’s tough to find bushels of roma tomatoes in Minnesota!
As the weather turns warmer we are starting to plant our own garden. Last year we planted some rhubarb that is slowly starting to reach the stage where we can pick it and enjoy it. Rhubarb, like asparagus, has as 1 season grow period so we couldn’t touch it last year. I hope we have a large crop this year, because this cobbler pie will be made again! My only issue with it (and I have this problem with every fruit pie) is that the juices didn’t thicken up as well as I would have liked. It likely required more baking time, though I did bake it for the entire 1 hour and 10 minutes, or more corn starch. The taste was excellent and paired nicely with some vanilla bean ice cream.
Go check out Tracey’s blog. She has the recipe posted, or if you have the Sweet Melissa Baking Book the recipe is in there. Thanks Tracey for this very seasonal pick!
In September 2008 my mom gave me her old new sewing machine (she preferred her older one) after she moved out of her house in Ohio. I, an avid knitter who always said “knitters make the fabric with their hands, sewers just use a machine to sew the fabric together”, really took to sewing. So instant! So gratifying! So unlike knitting! The exception to this instant gratification of sewing for me is quilting. I much prefer throwing together a little wristlet or pillow than carefully selecting fabric, cutting the pieces out, sewing the pieces back together and then, then, you have to make a back, sandwich that together with a layer of batting, sew the sandwich together and put a binding on. Exhausting! Plus, I have no patience. But, I love the look and feel of quilts and the idea of making something so comforting. (Not that a purse does not give you comfort…) The first quilt I made, with a lot of help, was froma Kaffe Fasset kit my mom gave me. This took out the need to choose fabrics on my own, which I think was the point. I learned to piece squares, and hopefully get the corners to match up. My mom helped me quilt it (by helped, I mean she quilted it!) and put the binding on. Then she left. I was on my own with a sewing machine. Not quite knowing where to start, I dragged my friend to a quilt fair with me. She is a knitter also, so I was really hoping there would be some yarn around to make the trip worth while for her. We came across the Crafty Planet booth (I’ve mentioned before how much I adore Crafty Planet!) where they were selling 1 yard cuts and fat quarters (and yarn too!). I picked out a bunch of Amy Butler prints, and some other unidentified prints.
After a few more trips to Crafty Planet I had enough fabric to make a quilt! And had spend a small fortune…
I pieced it on my own, waited for my mom to get back into town and she quilted it for me. I only have made 4 quilts ever, this one being number 2, but I can already tell where I went wrong in choosing the fabric. This pattern needed fabric with small prints and a very, very subtle background. I thought my polka-dots were subtle enough, but I find them distracting. I do still find this quilt very pleasing. I love the colors, and the backing.
On an unrelated note, I’d like to mention how thrilled and honored I am to have my quilt featured on the Sew, Mama, Sew! blog as a Quilt of the Day! So. Exciting. If you’re finding me from their website – welcome! When they emailed me to ask if they could feature that quilt (duh! of course you can!) it motivated me to start posting more and to take more pictures of projects I have done. Thank you Kristin and the Sew, Mama, Sew! team!
A few years ago my friend Melissa gave me the Sweet Melissa Baking Book as a gift. I never made anything from it for no other reason other than sheer laziness. Tastespotting.com, blogs, magazines, etc. were all easier resources for me to use when searching for recipes, though I did often see references to the cookbook (or baking book as it were) in the blog-osphere. I did come across the Sweet Melissa Sundays group and thought this would be a good way to try a bunch of difference recipes from this revered baking book and an excuse to have baked goods at least once a week!
Mermaid Sweets chose this week’s recipe – Sweet Potato Bread with Cinnamon-Orange-Rum Glaze – and I will admit, this is not one of the recipes that jumped out at me when I first perused this book. I never would have tried this recipe were it not for the SMS group and I thank you for it! This bread cake (who are we kidding calling it a bread?!?) is so unbelievably moist and the cinnamon-rum-orange glaze gives it a nice flavor and helps seal all that moisture in.
This is what you will need:
I had never purchased/had a use for/thought about using canned sweet potatoes prior to this recipe. They smelled like baby food and looked a little strange and pathetic in the can. I think canned pumpkin or pureed butternut squash would substitute nicely for the sweet potatoes. (If you’re anything like me and freaked out when Libby’s said there was a pumpkin shortage this past Thanksgiving, you have TONS of canned pumpkin lying around.) I like to make recipes as-is the first time around before deciding on substitutions or alterations so I stuck with the canned sweet potatoes. Nuts are an exception to this rule. I love nuts but my husband and step-daughter do not, so I find myself leaving them out of most recipes. It’s a shame, too, because the recommended pecans would work very well in this bread cake. I also think topping it with a more marshmallowy frosting would work well around Thanksgiving as a twist on the classic sweet potato dish we’ve all had.
Visit the Mermaid Sweets blog for the recipe or go out and buy the book! There are some really great recipes in there and I’m looking forward to trying out a lot of them over the next several months.
It’s been unseasonably warm in Minnesota and we’re seeing signs of Spring weeks earlier than we usually do. No complaints here, but after yesterday’s post reverting back to the Super Bowl – amazing what a look through iPhoto will drudge up – I thought I’d bring it back to the here and now…
Since it was in the mid-70s and we were having some friends over for BBQ chicken I thought a summery berry cake would be a good ending. This cake was delicious and I have spent most of the day thinking about it. I cannot wait to get home and have a slice!
Angel Food with Berries and Cream
1 store-bought Angel Food Cake (not a loaf)
12 oz – 1/3 less fat cream cheese
1/2 cup powdered sugar
1 80z tub of Cool Whip (thawed) – I used the light Cool Whip
Assorted berries – I did strawberries, blueberries and raspberries though I think thawed frozen cherries, blackberries or any other combo would be delicious
With a hand mixer whip the cream cheese with the powdered sugar until a smooth consistency. Fold in the Cool Whip and stir gently until smooth. (I will fully admit that I did not wait until my Cool Whip was thawed, so I ended up mixing it into the cream cheese mixture with the hand mixer. No harm done, it worked perfectly, but I know you’re supposed to gently fold in whipped cream to keep the volume. Whatevs, I say.)
Slice the cake through the middle, separating it into two layers, a top and a bottom. I always have a hard time keeping a straight line but the hole in the center helped me keep an eye on the knife. Set the top aside and spoon about 1/2 the cream cheese mixture on top of the cake. Sprinkle with 1/2 the assorted berries and put the cake top on. Spoon the remaining cream cheese mixture over the top and sprinkle with the remaining berries. Keep in the refrigerator until ready to serve.
Enjoy!
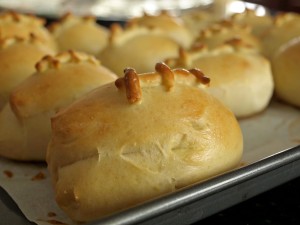
This post is a few months too late, but it’s never too early to start preparing for football season, right?!? At least my husband thinks so. I’m more about the food. We had a few people over for the Super Bowl this year and I decided it would be fun to make football rolls for our pulled pork sandwiches. There is nothing better than a homemade roll, and as I’ve mentioned before, the bread machine is a dangerous kitchen tool.
I wish I had a picture of the finished product. Seeing these faux pigskins filled up with pulled pork, Carolina sauce and coleslaw…too good.


